Start with the range you can put in front of the camera
List the products by the names or references your team uses. Identify visible variants such as colour, size or finish, and mark which samples are ready. A broad request to photograph the range can hide missing items until the shoot.
Confirm that labels, packaging and included parts match what customers will receive. Separate final samples from prototypes or items awaiting a change. Give the production team a clear list of anything that should not appear yet.
Put priorities beside the list. If a launch depends on particular products being shown first, make those identifiable. Availability and intended use should guide the session, rather than treating every sample as equally urgent.
Give each photograph a clear job
Decide what someone should learn from each view. A clear overall photograph identifies a product. A detail shows a feature or finish. A picture of an item in use explains how it is handled. A group image shows the relationship between selected products.
Those are choices for the brief, not a standard quota. Some products need several views to explain them; others repeat information if photographed from every possible angle. Choose the views that answer a real question.
Brief product photography around those questions. If you are still deciding how product imagery fits beside team, premises and other business photographs, the commercial photography guide covers that wider commissioning decision.
- Identification: which view makes this product and variant recognisable?
- Detail: which surface, component, label or feature needs a closer look?
- Size or use: what real context helps someone understand the item?
- Range: which products belong together, and what does the group need to show?
Choose a clear view, a setting or both
A simple product view keeps attention on the item. A styled scene puts it in a setting. Tell the team which purpose matters for each asset and provide any existing layout or visual reference that explains the choice.
Keep the product itself accurate. Confirm colour, finish and labelling, and identify any props that are separate from what is supplied. Check that a group photograph does not imply that separately sold items come together.
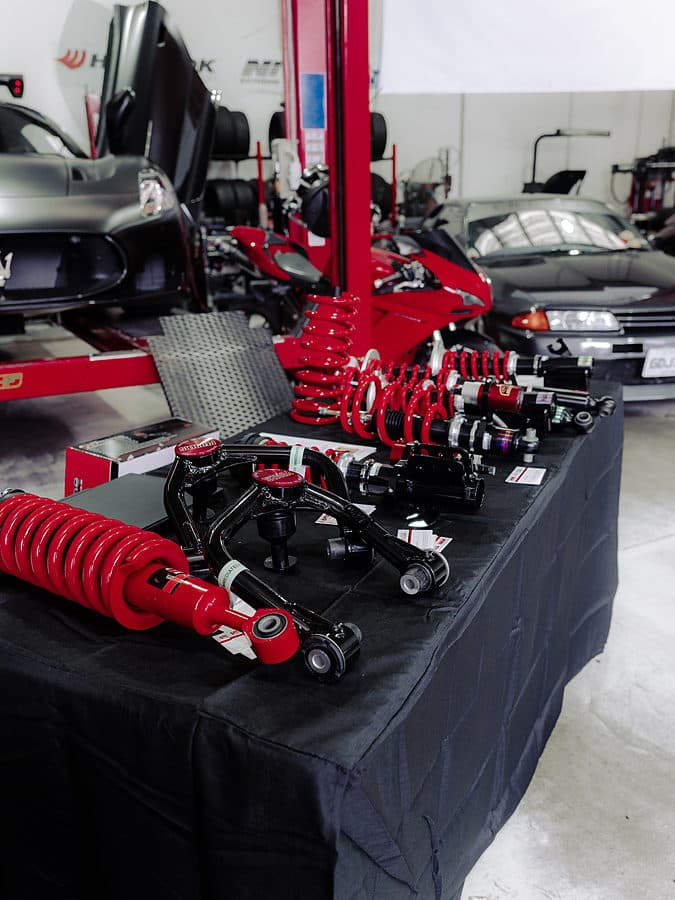
The DHF Tyres photograph below shows suspension components displayed inside a workshop. The surrounding vehicles and equipment give the display a setting. It is an example of a product display photograph; it does not stand in for a catalogue of individual product views.
Film something the viewer needs to understand
Choose motion when there is a useful action to show. A planning example might be a person opening an item, handling a part or demonstrating a feature. Name the action and the point it explains before deciding how long the film should be.
Confirm who will demonstrate the product and which sample they will use. Give the team the factual explanation, approved terminology and any limits on what the demonstration should imply. If a statement needs checking, resolve it before it is recorded.
Discuss the edit when briefing product and social video. Specify whether the piece needs an explanation, a short action sequence, text on screen or several agreed versions. The finished films and review arrangements belong in the scope.
Share the places the work needs to fit
List the destinations: a product page, a website banner, a presentation, print or social channels. Show the production team the relevant layout where one exists. Space for a heading or a portrait crop is easier to plan before the frame is made.
Check any requirements supplied by the platform or designer responsible for that destination. Bring those current requirements into the brief rather than assuming one image specification suits every use.
Flag versions that need different framing or wording. Photographing a product does not automatically include every later crop, graphic treatment or video edit. Agree the required files while the work is being scoped.
Prepare the samples and the review contact
Group products and their included items so the team can identify them without guessing. Keep the product list beside the samples and note anything that must stay together. Check the visible condition and final labels before the session.
Nominate someone who can answer product questions on the day and someone who can approve the work afterwards. They may be the same person. Make sure they can check names, variants, details and any demonstration claims.
Use that review to check accuracy as well as appearance. Confirm that each photograph or film matches the intended product and purpose before your team puts it into use.
Plan later sessions around real changes
A new range, changed packaging or additional variants may call for another session. Keep a list of those changes beside the assets you already have, so a later brief identifies what needs replacing and what remains useful.
Some product businesses have a one-off requirement. Others have a steady flow of new subjects and versions. Where that work is recurring, discuss ongoing photography and video production around the actual range and release dates.
For on-location shoots in Melbourne and the South East, include the address where the products and people will be available. Confirm space, access and sample arrival dates before settling the shoot plan.
Copy this product shoot brief
Complete an entry for each product or group with a distinct purpose. Attach the current range list and any layouts or factual references the team needs.
- Product and variant: which exact item, colour, size or finish should appear?
- Purpose: should this asset identify the item, explain a detail, show use or present a range?
- Key detail: what must be visible and accurate, including labels and included parts?
- Still or video: which views, actions, participants or spoken explanations are required?
- Intended use: where will it appear, and which framing or agreed versions are needed?
- Availability: are the samples and packaging final, where are they, and when can they be used?
- Review contact: who checks the product facts and returns approval or corrections?
Before you commission the shoot
Does every product variant need its own photograph?
List the differences customers need to see, then agree the views that represent them accurately. A visible change in colour or finish may need its own image. Do not use one variant’s photograph to imply an appearance it does not show.
Can we commission product photos and edited video together?
Yes. Explain the job of the photographs and the action or information the films should show. Plan the samples, participants and intended versions together, then agree the delivery scope.
Can we photograph products before the packaging is final?
Tell the production team exactly what is ready and what will change. You might plan views that do not depend on the unfinished packaging, or schedule the session when final samples are available. Do not present provisional details as the final product.
CONTENTS